Entering a New Loan
This section will give you a step by step instruction on entering a Standard Loan. To proceed with entering a new loan some things need to already be established, such as: Lender information Lender, Loan Defaults Loan Defaults,and Custom Fees, Custom Fees to mention a few.
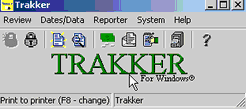
1. From the Trakker main menu select Review>Loan>New or F7
2. Type in your lender # or select list and double click on the lender number or name.
3. Click on the Borrower type (default is individual)
4. Click Next

5. Click on Portfolio (default is mortgage) and select which option you need

6. Click on Loan Type (there are 24 different options to choose from)
7. Scroll down to the one that best fits your needs
8. Click Next
9. Complete the First Name/Last Name field. To separate the first names with a /
If the last names are the same you only need to enter it once.
10. Click Next

11. Complete the Address/Collateral information and Loan Class Code
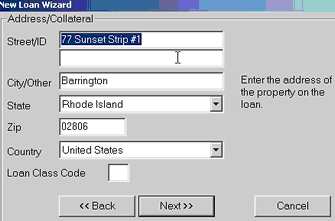
NOTE: Loan Class Code will allow you to divide loans into various classifications/types such as: 1st Mortgage, 2nd Mortgage, Auto, Unsecured etc. By classifying loans you will be able to print reports for each class specified.
12. Click Next
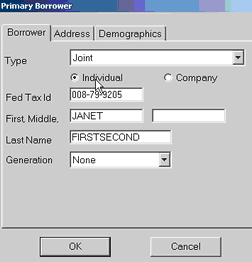
13. Highlight the name click EDIT

14. A new dialog box will appear Complete and fill in the areas needed. (To edit the address or demographics click on the tabs)
NOTE: Do not click OK until all tab changes have been made
15. Click OK
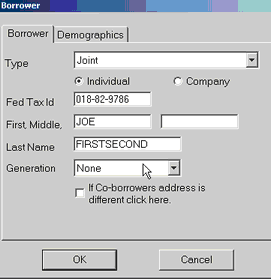
16. Highlight the co-borrowers name and click EDIT
17. Complete the needed information. (Be sure that the Type has the necessary information)
18. After ALL the tabs have been corrected click OK
19. Click NEXT
20. You will see a dialog box where you can add another co-borrower or guarantor
21. Click NEXT
22. Fill in the appraisal and collateral information click Next
(You can use any thing you are using as collateral such as Auto, ATV, savings, CD, and is not limited to real estate, or leave it blank)
23. Click NEXT
24. Complete the Late Fee Requirements and Service Fee needs of the note (optional)
25. Click NEXT
26. Complete the Pre Payment Penalty and Past Due Fee information (optional)
27. Click NEXT
28. Click NON-ESCROW ACCOUNT (Begin Date is the date you begin servicing this note)
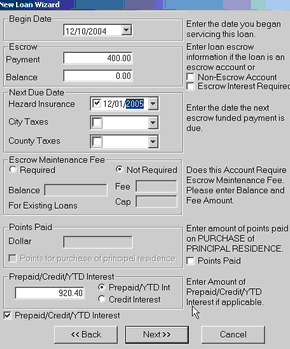
This will grey out the escrow information
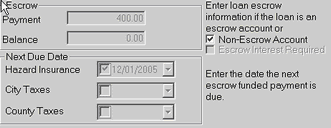
29. Click on Points Paid and Prepaid/Credit/YTD interest if require. (if no points, prepaid interest, or accrued interest were not paid at closing do not mark this box)
30. Click NEXT
31. Complete the information requested. (This will come from the Loan document signed by the borrower's)
NOTE: The comment section will be an ideal place for any account information on existing loans, such as the original account number.
32. Click NEXT
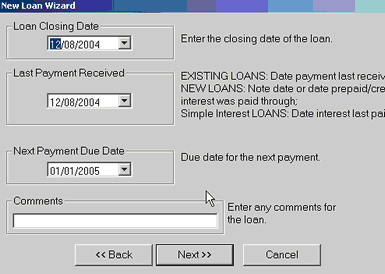
For the purpose of this example the next screen will not have any changes
33. Click NEXT

34. Complete the information requested in the next screen. (This comes from the loan document that the borrower signed)

35. Click NEXT
Review the information on this next screen for accuracy. (If any information is incorrect select the BACK tab until you are on the screen to change the information then select NEXT until your are back to the this screen)

36. Click FINISH
You will be then prompted for Coupon Books (be sure coupon paper is in your default printer)
37. Click YES
38. If Borrower is responsible for the Borrowers fee Click YES if Not click NO
39. You will then see a dialog box with your Trakker account number.
CONGRATULATIONS you have just completed a standard loan set up in Trakker